A skill that screenshots your app for the landing page by itself
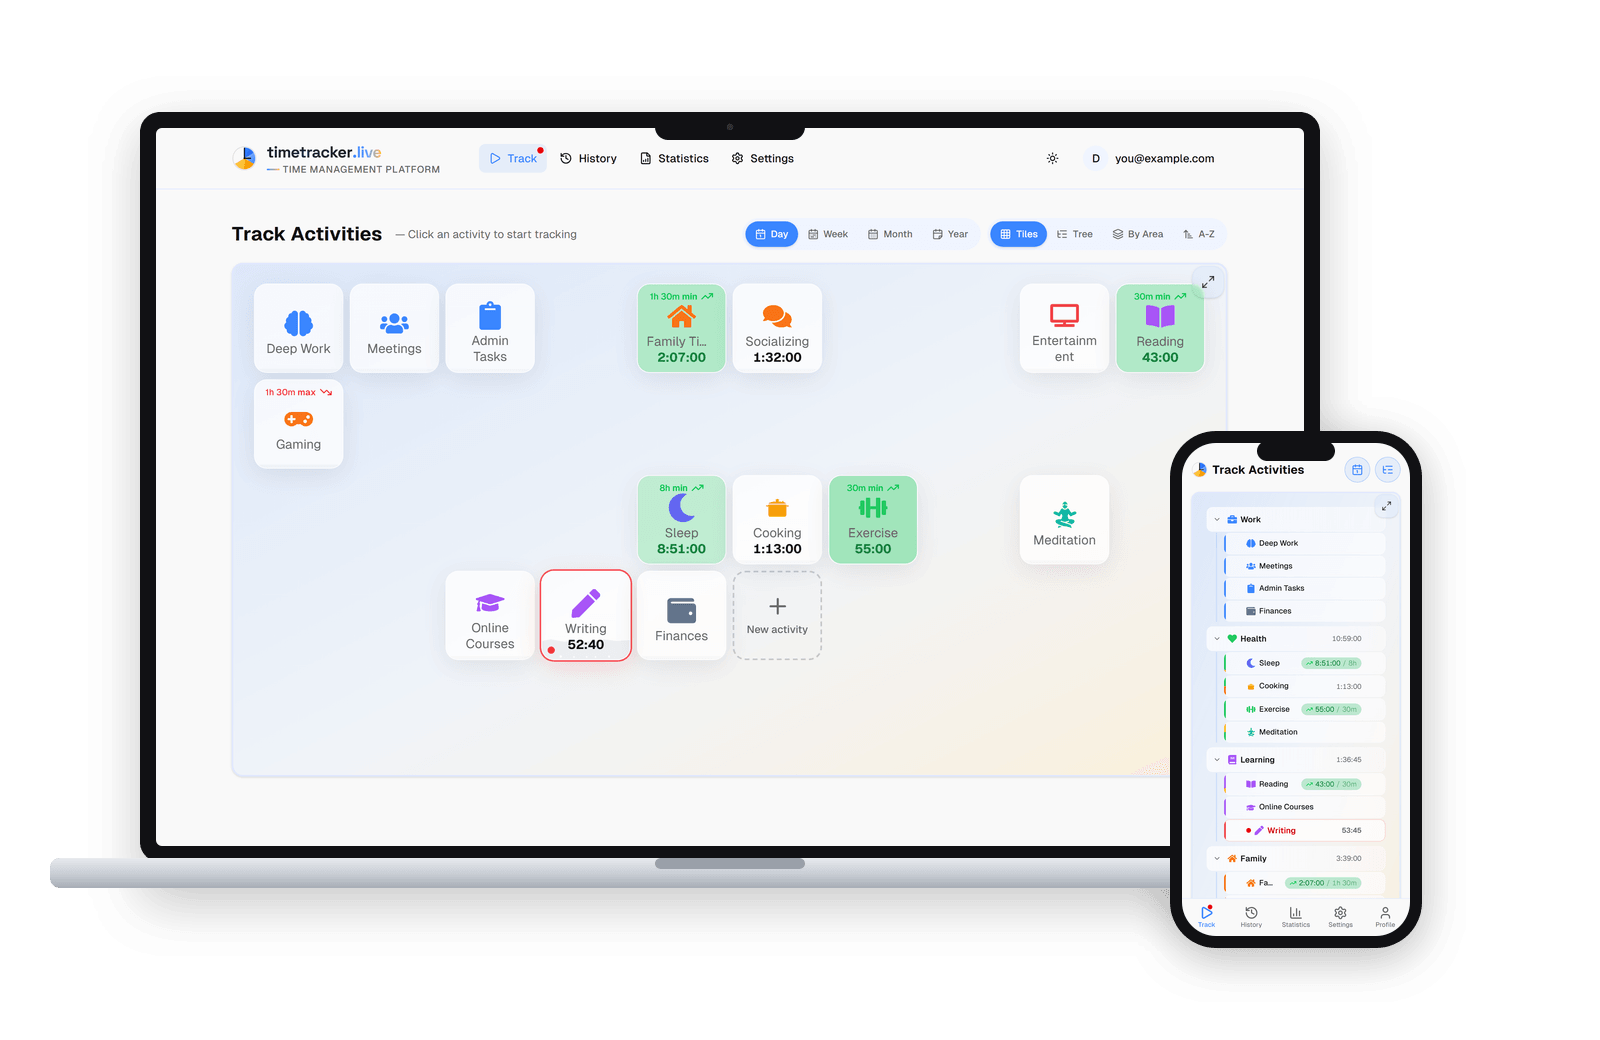
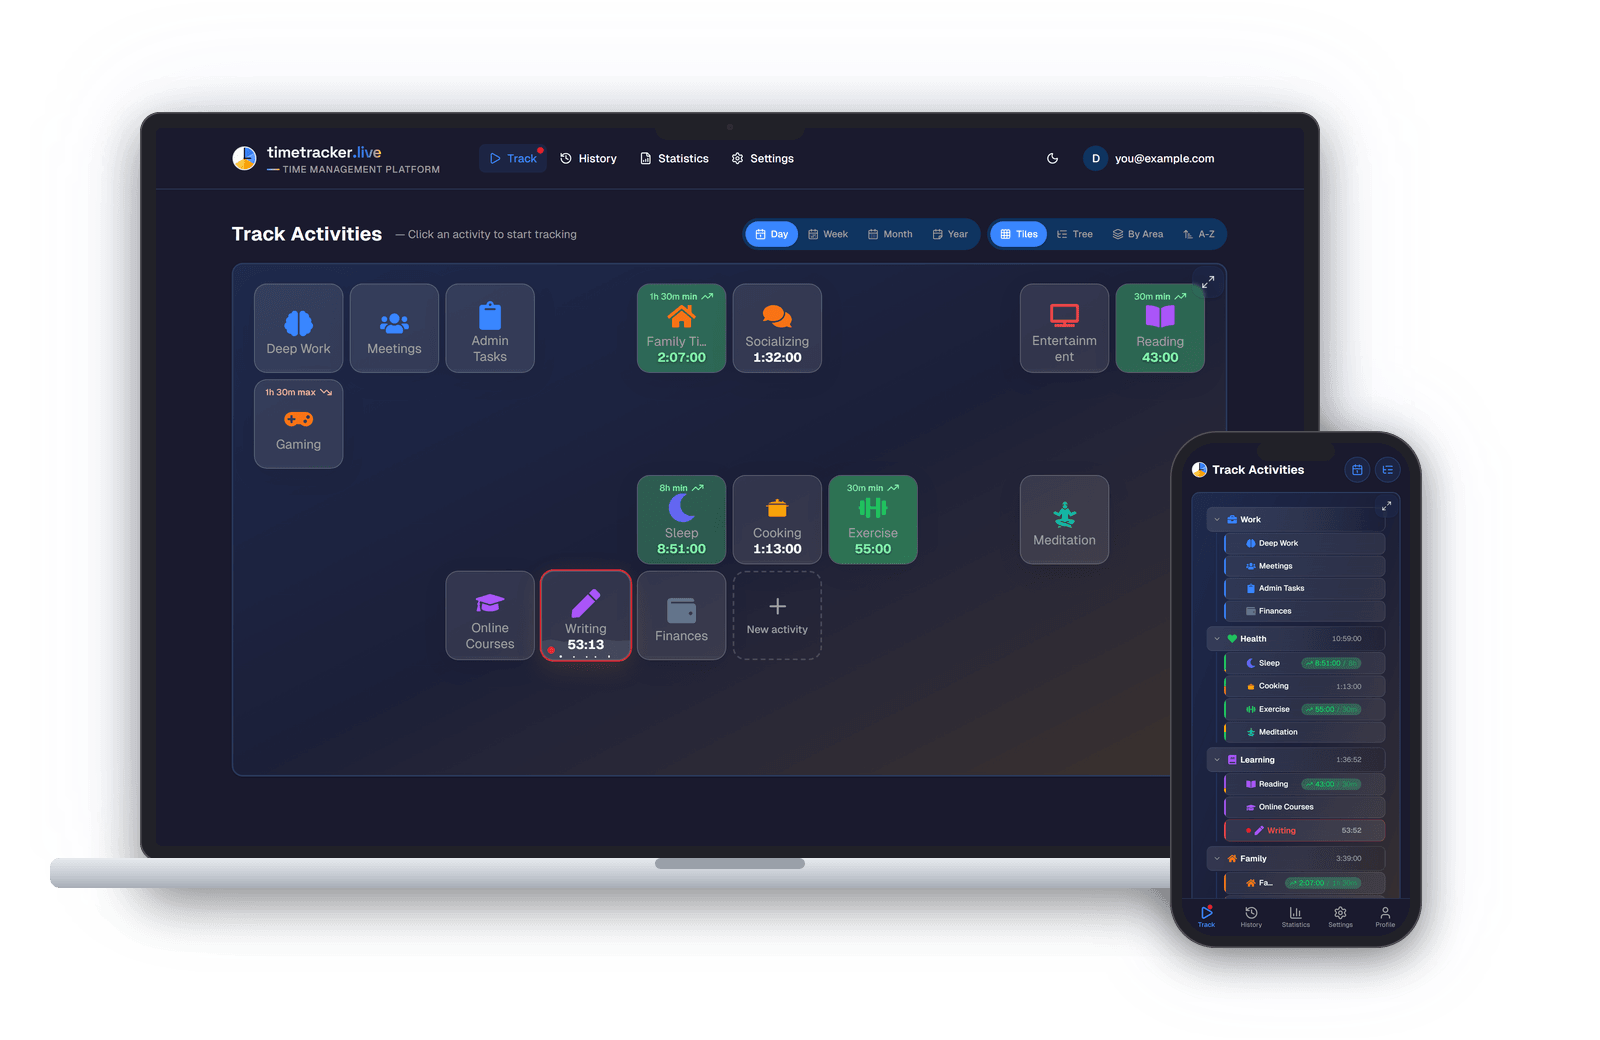
Screenshots on a marketing page are the kind of work you hate twice. The first time is when you take the shots by hand, curate the data so there are no empty tables and no "asdf" test rows, then drag everything into Photoshop for a browser frame and retina sharpness. The second time is a month later, when you've changed the UI and every image is stale at once. And round you go again.
At some point I decided enough was enough. Let the app screenshot itself. And so I wouldn't have to rebuild this pipeline from scratch in every project, I wrapped it in a skill for Claude Code. Now "set up the marketing screenshots" works in any new project, not just the one where I already wired everything up by hand.
Why screenshots are a pain in the first place
Dig in and it's not one problem but a whole bouquet:
- Data. A dashboard screenshot shouldn't show "Project 1," "test test," and zeros. You need lively, pretty, consistent data — and the same data across every shot.
- Frame and composition. A bare screenshot looks cheap. You want the screen in a laptop or phone frame, sometimes several shots overlapped, something cropped, something nudged. By hand that's a trip to Photoshop every time.
- Retina. A 1x shot on a modern display is mush. You need 2x — and to capture it by hand you have to set up device emulation or browser zoom every single time, and remember to do it on every shot.
- Two themes. I build sites with a light and a dark theme. A light screenshot on a dark site looks awful, so the images are adaptive too: on the light theme the shot from the app is in the light theme, switch to dark and the shot repaints in dark. That instantly doubles the work — every screen has to be captured twice.
- Staleness. Change a button and five images on the landing page are now lying. Nobody re-shoots them by hand in time.
Each of these pains is easy to solve on its own. The problem is that together they add up to a chore you can't be bothered with. And when you can't be bothered, the screenshots on the site are always a little stale and a little ugly. More often it ends with simply too few images: adding them is a hassle, redoing them later is a hassle too — and a visitor lands on the page, sees a wall of text without a single screenshot, finds it boring to read, and leaves.
The idea: the app screenshots itself
The solution is almost banal: don't draw mockups — capture the real, running app through a headless browser. Then the picture can't lie by definition — it literally is your product. And that means you can regenerate it any time with a single command.
This works especially well for me because of my hybrid development approach: the app builds for every platform from a single codebase and looks the same everywhere. So one shot from the browser honestly represents both desktop and mobile — no need to spin up a phone simulator just for the mobile frame.
The system fell into two parts — and that's the key decision behind the whole thing:
- A universal engine (
scripts/screenshots/) — copied into any project as is, no edits. It knows nothing about the specific app. - A per-project config and seed — a small file with the list of screens, plus a script that seeds pretty demo data. That's the only thing you rewrite per project.
The reference implementation lives in my time tracker. The rest of this is on its example.
The engine: what capture.js does
The engine is a set of Node modules on Playwright and sharp. Its heart is captureShot, which takes one shot in a fresh, isolated browser. That's the first non-obvious decision: a cold headless browser on the dev server's first load occasionally renders a blank page, and isolating each shot in its own browser kills that flake.
async function captureShot(opts) {
  const { baseUrl, route, viewport, deviceScaleFactor = 2,
          theme = 'light', prefs = {}, maskEmail, wait,
          settleMs = 400, screenshot = {}, outFile } = opts;

  const browser = await chromium.launch();
  const context = await browser.newContext({
    viewport,
    deviceScaleFactor,        // retina
    timezoneId: 'UTC',
    colorScheme: theme === 'dark' ? 'dark' : 'light',
  });
  // ...
}
Inside there are a few important details.
Auth without a login form. No clicking through the sign-in screen on every shot. Before navigation, tokens and a cached user are injected into localStorage — and the app immediately considers itself logged in:
await context.addInitScript((prefsArg) => {
  for (const [k, v] of Object.entries(prefsArg)) {
    window.localStorage.setItem(k, v);
  }
}, prefs);
Wait until the screen is actually ready. Waiting for the page to load isn't enough — you have to wait for the data to arrive and the animations to settle. So a shot waits for networkidle, plus an optional data-readiness selector, plus a short pause to "settle":
await page.goto(`${baseUrl}${route}`, { waitUntil: 'networkidle' });
if (wait) await page.waitForSelector(wait);
await page.waitForTimeout(settleMs);
Clean the frame before the shot. Chat widgets, the Next.js dev badge, a real email in the corner — none of that belongs on a landing page. So right inside the page we hide every element with an insane z-index, drop nextjs-portal, and replace the email with a nice fake one:
await page.evaluate((mask) => {
  for (const el of document.querySelectorAll('*')) {
    if (parseInt(getComputedStyle(el).zIndex, 10) > 1e6) el.style.display = 'none';
  }
  document.querySelector('nextjs-portal')?.remove();
  if (mask) {
    for (const el of document.querySelectorAll('*')) {
      if (el.children.length === 0 && el.textContent === mask.real) {
        el.textContent = mask.masked;   // demo@timetracker.live → you@example.com
      }
    }
  }
}, maskEmail);
And over all of it — withRetry, a wrapper for that same cold-load flake: first run on a short timeout, on failure retry on a long one.
async function withRetry(label, fn) {
  try { return await fn(25000); }
  catch (e) { return await fn(60000); }   // cold-load flake
}
The main thing about the engine: you don't touch it. Copy it and forget it. All the project specifics live outside.
The config: what to shoot
The whole "character" of a shoot lives in one declarative file, screenshots.config.js. It holds the list of shots contentShots, an authentication function, the prefs map to inject into localStorage, and a maskEmail pair:
const contentShots = [
  { name: 'tracking-interface', route: '/track', view: 'tiles',
    viewport: { width: 1340, height: 760 }, wait: 'text=Deep Work',
    screenshot: { mode: 'crop', selector: '[data-testid="tiles-grid"]', padding: 20 } },
  { name: 'feature-hierarchy', route: '/track', view: 'tree',
    viewport: { width: 640, height: 940 }, wait: 'text=Deep Work',
    screenshot: { mode: 'crop', selector: '[data-testid="activities-tree"]', maxHeight: 660 } },
  { name: 'feature-corrections', route: '/history',
    viewport: { width: 460, height: 900 }, wait: 'text=Sleep',
    steps: [{ click: '[data-testid="entry-menu-trigger"]', waitFor: 'text=Replace Activity' }],
    screenshot: { mode: 'clip', clip: { x: 0, y: 0, width: 460, height: 640 } } },
];

module.exports = {
  baseUrl: process.env.BASE_URL || 'http://localhost:3002',
  deviceScaleFactor: 2,
  maskEmail: { real: 'demo@timetracker.live', masked: 'you@example.com' },
  authenticate, prefs, contentShots, hero,
};
Adding a new screenshot to the site means appending one object here and re-running. Each shot has its own capture mode (crop by selector, element, a fixed clip, or the whole screen), steps for clicks (open a menu, switch a tab), and prepare — an async function where you can, say, switch a chart to a more "demonstrative" grouping before the shot.
The seed: where the pretty data comes from
The most underrated part. A screenshot is only as good as the data in it. In the time tracker that's handled by a dedicated Django command, seed_demo. It seeds a dedicated demo account with a whole little "world": life areas (Work, Health, Learning, Family, Rest), a tree of activities with icons and goals (Deep Work, Meetings, Exercise, Sleep, Reading…), and — most importantly — several weeks of history following a realistic daily rhythm.
class Command(BaseCommand):
    @transaction.atomic
    def handle(self, *args, **options):
        # Idempotent reset: delete the user — areas, activities and
        # all time entries cascade away.
        CustomUser.objects.filter(email=DEMO_EMAIL).delete()
        user = CustomUser.objects.create_user(email=DEMO_EMAIL, ...)

        # ...create areas, the activity tree, goals, tile positions...

        # ~5 weeks of entries by a daily "rhythm" (weekday/weekend)
        # with ±20% jitter so the stats look alive
        rng = random.Random(20260530)   # fixed seed → stable result
        for day_offset in range(days - 1, -1, -1):
            rhythm = WEEKEND_RHYTHM if is_weekend else WEEKDAY_RHYTHM
            for act_key, base_minutes in rhythm:
                minutes = int(base_minutes * rng.uniform(0.8, 1.2))
                # ...append a TimeEntry...

        # for "today" leave the last block without an end_time —
        # the app will show an active, "running right now" tracking state
There are a few nice details hidden here. The daily rhythm is described by a template (sleep, exercise, deep work, meetings, reading…), and each block gets random jitter — so the charts look organic, not drawn with a ruler. random.Random with a fixed seed keeps the result stable from run to run. And the last "today" block is deliberately left open, with no end time, so the screenshot shows the live "tracking right now" state.
The command is idempotent: every run deletes the demo user and recreates everything from scratch, so the account never accumulates cruft and the screenshots come out deterministic. (The seed is the only thing tightly coupled to the app's data model, which is why it's rewritten per project.)
Frames: MacBook and iPhone, no Photoshop
A bare screenshot looks forlorn on a landing page. So a separate module, buildHero, takes the desktop and mobile shots and composes them into a single hero — the screen in a MacBook frame, a phone in an iPhone frame beside it. No Photoshop: it's all assembled with sharp:
async function buildHero({ rawDir, outDir, desktopName, mobileName }) {
  for (const theme of ['light', 'dark']) {
    const suffix = theme === 'dark' ? '-dark' : '';
    // ...lay the desktop into a MacBook frame, mobile into an iPhone frame
    await sharp(/* canvas */)
      .composite([/* desktop, mobile over the frames */])
      .png()
      .toFile(`${outDir}/hero${suffix}.png`);
  }
}
The output is hero.png and hero-dark.png for the site's light and dark themes.
How to use it
The whole pipeline is wired into npm scripts, and the final chord is screenshots:all, which runs everything in a chain:
"screenshots:seed":     "cd ../timetracker-api && docker compose exec -T web python manage.py seed_demo",
"screenshots:capture":  "node scripts/capture-screenshots.js",
"screenshots:hero":     "node scripts/generate-hero.js",
"screenshots:optimize": "node scripts/optimize-screenshots.js",
"screenshots:all":      "npm run screenshots:seed && npm run screenshots:capture && npm run screenshots:hero && npm run screenshots:optimize"
(In the real project the chain has a couple more steps — for the "how it works" block and a combined statistics chart — but the gist is the same.) Seed the data → capture all the shots → build the hero → optimize. The finished PNGs land in public/screenshots/, where the landing and product pages pick them up. Optimization deliberately comes last: it shrinks the images to a reasonable weight, but the format stays PNG — so existing references and the image sitemap don't break. Change the UI, run the command again, and every image is current. Screenshots stop going stale, because they're no longer a manual artifact but a function of the current code.
So where does the skill come in
I could have stopped there — the pipeline works in one project. But a pipeline is good right up until you need to repeat it in another project. A couple of hours later I went to do the same thing in a new app and caught myself thinking I needed almost the same thing but slightly different — which means I had to separate the shared part from the specific part.
What's inside the skill
So I wrapped it all in a skill for Claude Code. A skill is just a folder with a SKILL.md that describes when to apply the skill and what to do. The description has triggers like "set up the marketing screenshots," "refresh the landing images," "add a new screen to the shoot." Inside is an instruction and a table that splits the portable from the specific:
| Universal (copy as is) | Per-project (write each time) |
|---|---|
the scripts/screenshots/ engine | screenshots.config.js (URLs, auth, shot list) |
| the thin runner scripts | the demo-data seed for the app's model |
| the list of gotchas (flake, timezone, overlays) | which landing pages consume the images |
The skill is deliberately thin
The trick is that the skill itself is deliberately thin. It doesn't try to describe the engine in words — it points at the reference implementation in the time tracker and says "copy it verbatim." The real artifact is the engine's code; the skill only teaches Claude how to deploy it in a new place and what to adapt. Separately, the skill stores the very thing it was all for — the accumulated gotchas: the cold-load flake, UTC, hiding chat widgets, "optimize last." This is knowledge that isn't visible in the code but without which the pipeline comes together on the third try.
How it turned out
Now in any new project I just tell Claude "set up the marketing screenshots" — it finds the reference, copies the engine, writes a config for my screens and a seed for my data model. What used to be an evening of fiddling in Photoshop is now a single sentence.
What's next: tie it to Figma
Store screenshots through Figma
The landing page is only half the story. The other half is store screenshots: Google Play and the App Store demand images at strictly fixed sizes, and not a "bare" screen but a neatly composed one. I make them in Figma from prebuilt templates, and it's not just a frame at the right size — it's a whole composition: a background fill or gradient, a device frame, big caption headlines ("Track every minute," "See where your time goes"), sometimes arrows and callouts pointing at specific parts of the UI. The app shot is just one layer inside all that wrapping. The same screenshot drops into templates for various sizes and formats, and Figma then hands you ready slices for each store.
The problem is exactly the same as with the landing page: change the UI and the screenshots in the store templates are stale. Right now this piece is still manual: re-shoot the screen, open Figma, replace the image in every template, export the slices. The logical next step is to teach the same skill to close this too.
The plan: the skill captures fresh shots with the same engine, drops them into the existing templates through a Figma integration — only the screenshot layer changes, while the whole composition (background, frame, captions, callouts) stays put — and then pulls out the ready slices at every required size, separately for Google Play and the App Store. Then the whole path from "changed a button" to "refreshed the images on the landing page and in both stores" collapses into one command. The engine already knows how to produce an honest shot of the app — all that's left is the last mile: carefully nesting it back into the artwork and grabbing the result.
The same screenshots in every language
And the idea can be pushed further still. The engine already switches the theme before a shot — in exactly the same way it can switch the app's language. Automate the translations too (a separate task I'd also like to hand to the skill), and a single run captures the whole set of screenshots for every locale — for the landing page and the stores, in all languages at once. The captions in the Figma templates get filled from the translations as well.
Shipping turnkey: Fastlane
And the final chord — Fastlane. It's a release-automation tool for iOS and Android: it can upload to Google Play and the App Store not only screenshots and metadata but the new build itself. Hook that in and the chain closes completely: snap fresh shots → drop them into the Figma templates → export slices for every size and language → upload to both stores together with the new version. Shipping a new version turnkey — in one command, without a single manual step between "committed" and "live in the store."
What I took away from this
Two takeaways that work far beyond screenshots.
Turn the chore into a function of its data
The best way to avoid a chore is to turn it into a function of its source data. A screenshot generated from the live app doesn't go stale by definition. The moment an artifact stops being manual labor and becomes the output of a command, the "it's stale" problem simply disappears.
Separate the portable from the specific
The engine is portable, the config and seed are specific. That's what let me wrap it all in a skill so Claude can stand the system up in a new project by itself. And a good skill doesn't duplicate logic in words — it points at a ready artifact and keeps, inside itself, the thing recorded nowhere else: the rakes you've already stepped on, so you don't step on them again.
And from there the same principle scales: once you've separated the honest app shot from whatever it gets wrapped in, you can keep adding new "wrappers" — a frame for the landing page today, store templates tomorrow — without touching the thing that captures those shots.